There are many ways you can go budget camping. Check out how I set up my vehicle and camping gear in the most frugal way.
Introduction
One of the things I wanted to do after FIRE was to slow travel around Australia. There are many ways to do this – as simple as rolling a swag up in the back, or as complex as towing a caravan or getting an expensive RV. But, being the frugal member of the FIRE community that I am, I wanted to be able to do this without shelling out $50,000 for a used 4WD, or another $100,000 for a caravan to tow!
Whilst I have done my fair share of ‘roughing it’ sleeping under a tarp with a groundsheet, as well as wild camping trips in my swag or with a tent, I wanted something a bit quicker and easier to set up – after doing some reading into roof top tents, and then hiring a Jucy camper van, my partner and I decided we should give it a go and try to set up our own frugal vehicle camping set up.

The vehicle
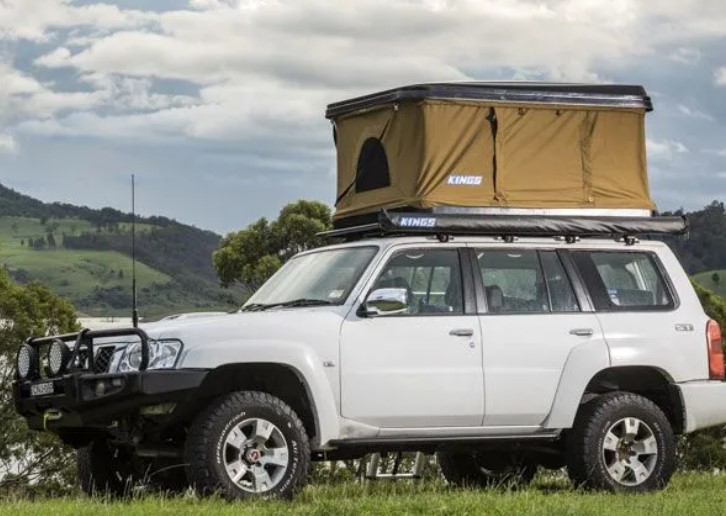
The vehicle is a 2005 Subaru forester station wagon, with a rear cargo area storage cage. ‘Stock as a rock’ apart from a light bar wired into the high beam circuit, and roof racks for the roof top tent. I have had the station wagon for 10 years, and its a great car that’s already taken me all over Australia, having done a few Nullabor trips (when I moved from Newcastle to Perth for work, and then Perth to Sydney) as well as North-South going from Melbourne up to Far North Queensland and back.
I have Pirelli road tyres fitted, however we have been on the fence about potentially paying $1500 for a 2 inch lift and then adding some larger tyres (for another approx $2000).
When I bought it, it cost me $20,000, but today the value would be closer to $8,000.
We have been debating upgrading the vehicle to a Mitsubishi Pajero, which we think would be one of the most cost-effective (‘bang for your buck’) vehicles, which would let us explore some off-road trails.
“I don’t need therapy, I just need to go camping!”
Unknown
The bed – roof top tent
The bed is the Kings Kwiky 2.0 roof top tent bed. It is slightly larger than a king single, and comfortably fits us and the dog (ok – it is a little snug when the dog is up there). This just sits on top of three roof racks, and is super easy to set up – you just unlatch the four straps (in each corner) and then the oleo struts lift the clam shell apart and raise the roof. There is a telescopic aluminium ladder which is stored inside the roof top tent, as well as the bedding, USB powered fan and solar lights.
The RTT has four windows, two small mesh windows at either end, and two large mesh windows with ‘verandah’ flaps and support poles on either side, allowing access from both sides of the vehicle.
We bought this from 4WD SupaCentre on special for $1000, we spent $200 upgrading the mattress at Clark foam and Rubber, and we already had our doona and sleeping bags / bedding from home.
The electrical system
Rather than hard wire a second battery into the car (there isn’t a lot of space to do this in the Subarus), we opted for a portable dual battery box system using a solar panel and mains battery charger. We saved money by not opting for the dual battery alternator charging system, which would have been $1200 installed by an auto electrician (I was not confident to install this myself).
- Battery: Kings 120Ah LiPO lithium 12V battery – $700
- Battery box: Kings maxi battery box – $100
- Solar panels: Kings 250W solar blanket with 5m lead – $250 (this is so we can use our blender to make smoothies!)
- Inverter: Kings 3000W inverter – $150
- 12V Battery trickle charger – $100 (this is so we can charge our battery up overnight at powered campsites)
Total: $1300
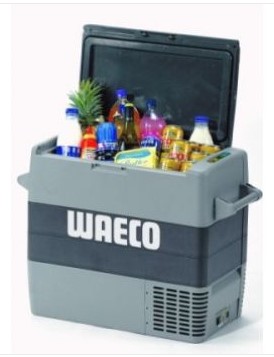
The fridge
We opted for a 60L Waeco dual zone fridge / freezer. We bought this second hand on marketplace for $400, because we didn’t want to spend $1200+ on a brand new one. It works great, and can be run off both the 12V lithium battery and also has a secondary socket for 240V mains power, which we will use whenever we are at a powered campsite.
This fits just perfectly lengthwise between the cargo cage and the rear door (boot) of the wagon, and can easily fit over two weeks worth of perishable groceries inside (combined with the dry food storage in tubs).
The cooking set up
We use a very basic meal preparation and cooking set up;
- Kings portable table
- Butane single burner cooker
- Pot and frying pan
- Metal camping plates, bowls, cups, and cutlery.
- Kettle
- 240V blender powered by the inverter and battery
I already had all of this stuff, but the total cost was approximately $300
The storage
Storage area is minimal due to the small size of the Forrester. Sleeping bag, pillows, and the ladder stay in the roof top tent when closed. We have the dog’s crate fixed in place to the back seat using the seatbelt loops and dog harness clips, then the dog just goes into the crate to be safe whilst we drive. This leaves one seat in the back available, as well as the two rear passenger foot-wells for water storage and a bag each (clothes / toiletries).
In the back behind the cargo cage, there is the fridge, the battery, the camping table and chairs, the folded up solar blanket, 3 x 25L storage crates, which we use for cooking items, pantry, dog food and our portable shower.
Misc
- Portable shower – $100
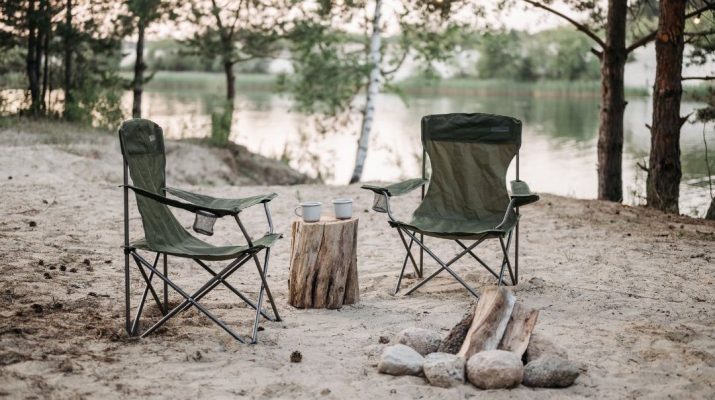
- Camping chairs – $10
- USB powered sound bar – $200
- 60L of portable drinking water jerries – $100
“Real freedom lies in wildness, not in civilization.”
Charles Lindbergh
Conclusion
In summary, it’s a pretty good budget setup, costing less than $12,000 to set up. Good camping gear and camping costs in general can get very expensive, so we are happy with this. The main drawback to this system is the rooftop tent can be uncomfortable in really bad weather (i.e. storms in the middle of winter, or heat waves in the middle of summer) as there isn’t any air conditioning or heating (like some caravans have), and the other obvious issue is there isn’t any toilet system (so we are relegated to nature poos or using restrooms / gym membership).
Overall though, for under $4,000 (plus the price of the car) it’s an extremely cost-effective and frugal camping system that we are looking forward to taking down to Tasmania for our trial run.
Don’t forget, you can always hit up thrift stores or garage sales for used gear too. Camping on a budget doesn’t have to be hard; just pack light, take your own food, enjoy free or frugal outdoor recreation activities and if you choose popular camping spots, book ahead and try for off season times.
Have you taken a frugal car camping trip, and how do you save money on camping equipment? Do you like to visit national parks or do you prefer glamping? Haha.. let me know!
Captain FI is a Retired Pilot who lives in Adelaide, South Australia. He is passionate about Financial Independence and writes about Personal Finance and his journey to reach FI at 29, allowing him to retire at 30.